
Commercial Tile Roof Replacement • Glendale, Arizona • Occupied Multi-Tenant Retail Center • Completed by Five Guys Roofing
Glendale Commercial Tile Roof Replacement: Rebuilding 5,950 Square Feet of Concrete Tile Across Four Roof Areas of an Occupied Retail Center
Five Guys Roofing stripped a 15-year-old concrete tile roof down to the deck, rebuilt everything underneath it, and set new tile across four separate roof areas while every suite in the center stayed open. Some details have been generalized to protect the property owner’s privacy, while keeping the scope, materials, and sequence clear.
City
Glendale, AZ
Property Type
Multi-tenant retail and shopping center, single story
Roof System
Concrete tile, full replacement over new two-layer underlayment
Service
Commercial tile roof replacement
Scale
5,950 sq ft across 4 separate roof areas
Warranty
15 Year Warranty
Pricing and What Drives It
Approved total: $61,950. That covered 5,950 square feet of tile roofing, or roughly $10.40 per square foot. The cost drivers on this roof were the full tear-off and disposal of both the tile and the underlayment, the two-layer underlayment specified underneath, all-new edge metal and bird stop on every edge, new flashings at the penetrations and walls, mortared hips and ridges, and four separate roof areas that each had to be staged, loaded, and closed out on an occupied center.
Tile replacement pricing generally moves with roof area, how many separate roof sections a crew has to stage and load, the underlayment specified, and how much metal and mortar detail the roof design carries. Allowances matter too: this scope included up to two sheets of rotted plywood decking, with additional sheets priced at $90 each.
The Situation
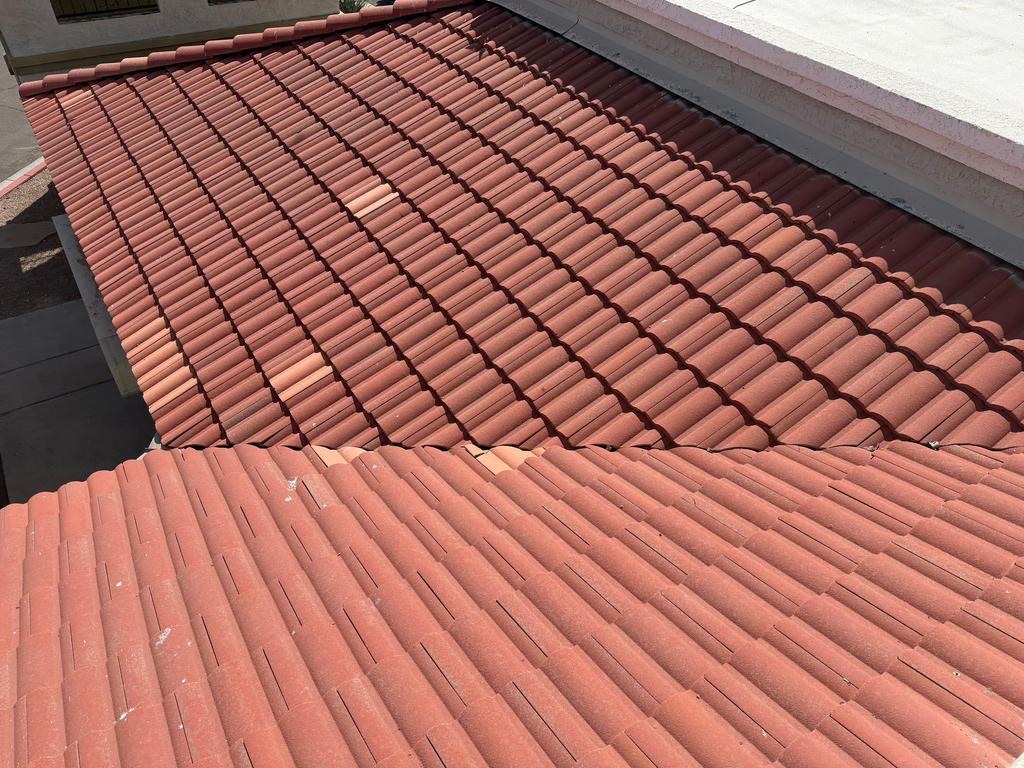
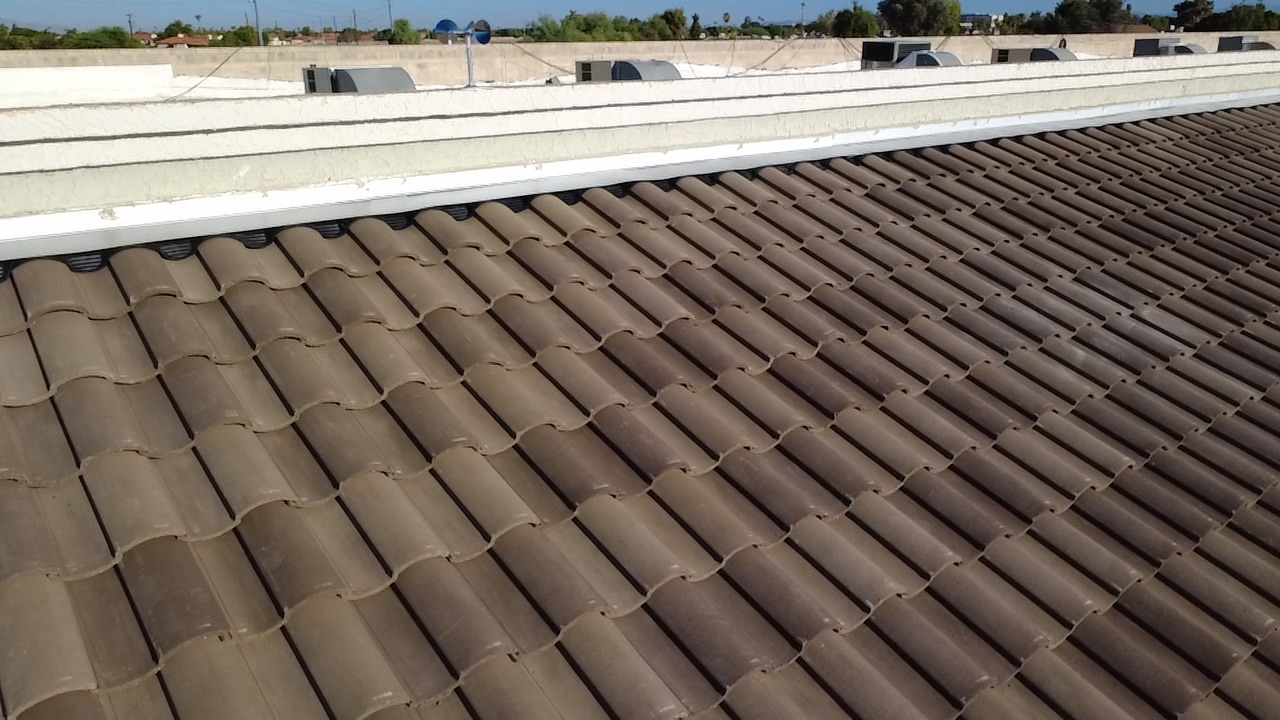
An existing commercial customer asked us to look at the roofs on a single-story retail center made up of a long main building and three smaller structures. The concrete tile was more than 15 years old. From the parking lot it still read as a sound roof, and up close it mostly did too.
The inspection told a different story once we started lifting tile. There was no meaningful tile damage, and no broken field tile driving the conversation. What we found was worn-out underlayment underneath, buried in years of dust and grit, with the batten and deck surface exposed wherever tile came up.
- A concrete tile roof system more than 15 years old across the center
- Underlayment worn out and no longer performing, while the tile itself remained largely intact
- Four separate roof areas, all of them over occupied, open suites
- Sections of deteriorated fascia board, measured and priced as separate work
- Earlier spot repairs visible as mismatched tile patched into the field
What Was Causing It
On a tile roof the tile is the rain shield and the sun screen. The underlayment beneath it is the actual waterproofing layer, and it is the part with a service life. Concrete tile in Arizona will outlast the felt or synthetic sheet under it, so a roof can look fine from the ground for years after the layer doing the work has aged out.
That is exactly where this roof was. Age, heat, and accumulated debris had taken the underlayment past its useful life, and no amount of surface repair would have changed that. Getting to it meant lifting every tile on the roof, which is the moment the decision becomes reuse the tile or replace it. The approved scope replaced the tile along with everything under it.
How We Verified the Roof Condition
We documented this roof twice before quoting it, because a multi-building center gives you more than one roof to be wrong about. The point was to know how much area was in play, what condition each section was in, and what was roofing work versus separate carpentry.
- Ordered an EagleView aerial measurement report to measure the roof areas
- Inspected the roof on site in April 2026, lifting tile to check the underlayment and confirming there was no significant tile damage
- Sent our inspector back for a second documentation pass covering every roof section, ground-level photos, and a marked aerial
- Measured the deteriorated fascia separately, about 530 feet of it, and priced that work on its own
- Delivered physical tile samples for the owner to choose from before anything was ordered
- Held a pre-job walk before mobilizing, and recorded a walkthrough for the project manager and coordinator
The approved scope covered the tile roof replacement. The fascia was quoted as separate work and is not included in the total on this page.
The Plan
The plan was a full tear-off and rebuild, sequenced building by building so that no suite lost access and no roof section sat open overnight without being dried in. Material was delivered two days before the start and split across the four roof areas: roughly four squares staged for one of the smaller buildings, three for another, five for the third, and the balance spread evenly across the main building.
The center stayed open the entire time, so the sequence was built around the tenants. Before mobilizing we met with property management and the tenants, blocked off only the parking needed for dumpster placement and roof access, and sequenced the work around each tenant’s business hours.
Materials and Components Used
- New Tile: Eagle Roofing Tile concrete tile, Eagle Capistrano in a brown range, with matching hip, ridge, and rake tiles
- Underlayment: Two layers of Malarkey Right Start UDL, installed per the manufacturer’s requirements
- Battens: New wood battens set at the spacing the manufacturer requires
- Edge Metal: New 3 x 3 edge metal in brown, plus a new eave riser and bird stop on every edge in brown
- Flashings: New C channel metal, new #1 counter flashings, roof-to-wall flashing, and valley metal, with flashings replaced around roof penetrations
- Ridge and Hip: So-lite weather block at the ridges and hips, with all joints and caps mortared
- Decking: Plywood inspected as tile came off, with up to two sheets of rotted decking included in the price
- Finish Detail: Pipe jacks, T-tops, and B-vents painted to match the new tile color
Step-by-Step Work
Pre-Job Walk, Safety Plan, and Occupied-Site Setup
A pre-job walk came first, a week before the crew arrived, and the walkthrough was recorded so the project manager and coordinator worked from the same picture of the site. A written safety plan was completed and issued to the crew before the start. Our project manager met the subcontractor crew lead on site to walk the plan, scheduled the dumpsters, and blocked off the parking areas that worked best for placement. He also met property management and the tenants so everyone knew what was coming.
Tear Off the Tile and Underlayment, and Haul It Away
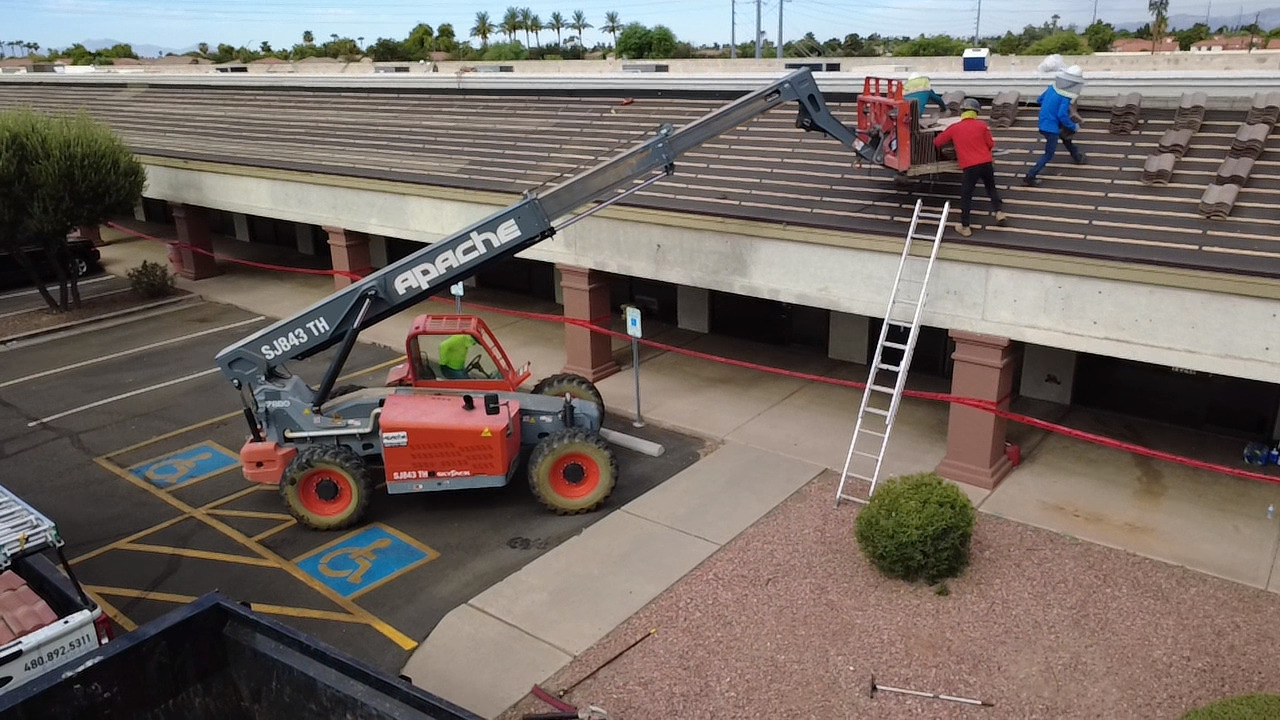
The crew stripped tile and underlayment down to the deck and filled two 20-yard dumpsters on the first day alone, with the dumpsters swapped out the following day. The tear-off order followed the tenants’ business hours, so two of the four roof areas were the first to come off and be dried in. Tile removed from one of the smaller buildings was palletized and hauled back to our yard rather than dumped.
Inspect the Deck, Dry In, and Rebuild the Metal
With the deck open we inspected the plywood and made the property aware of anything we found, then dried in with two layers of Malarkey Right Start UDL. New C channel metal, new #1 counter flashings, and roof-to-wall flashing went in at the penetrations and wall transitions, and new 3 x 3 brown edge metal plus a new eave riser and bird stop went on every edge. Nothing went back on that we could reuse instead of replace.
Absorb a Mid-Job Scope Change on One of the Smaller Buildings
After the crew had already dried in one of the smaller buildings, the property asked us to remove the raised niche above its front slope and flatten the area to match the rest of the roof. We demolished it, installed new plywood, and rebuilt the area with channels, roof-to-wall flashing, and peel-and-stick underlayment so it was properly waterproofed before tile. A power outage happened while that structure was coming off. We reported it to the property manager the same day and asked for an electrician to check the wiring and reroute it underneath the slope so we could close the area up correctly. The crew worked other sections until the electrical work was finished. The approved total did not change.
Set Battens, Load and Lay the New Tile, Mortar, and Clean Up
New battens went down at the required spacing, and the tile was roof-loaded by boom lift rather than carried up, which is what keeps a 5,950 square foot tile job moving. The crew set Eagle Capistrano tile with matching hip, ridge, and rake pieces, installed so-lite weather block at the hips and ridges, and mortared all joints and caps. Pipe jacks, T-tops, and B-vents were painted to match the tile. Tile installation finished on the Saturday, debris was hauled off, and the seven pallets of surplus tile left on site were picked up by the supplier the following week.
Results
Crews were on the roof from June 24 to June 27, 2026, and the project was completed on June 27. All 5,950 square feet came off and went back on inside that window, across four separate roof areas, with every suite in the center open for business throughout.
The property received a final photo set at closeout, and the surplus tile was returned to the supplier the following week.
The approved scope carried a 15 Year Warranty: a 15-year workmanship warranty from Five Guys Roofing covering both labor and material, plus a 30-year manufacturer warranty on the underlayment. It also includes free yearly inspections. The coverage on this roof runs to June 27, 2041, and the warranty document was issued to the property at closeout.
Before and After
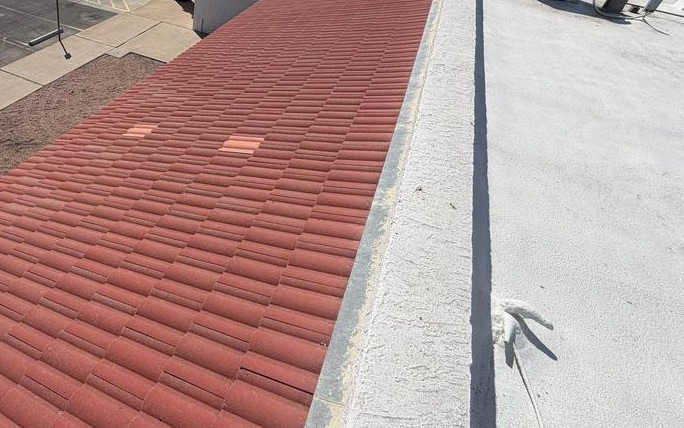
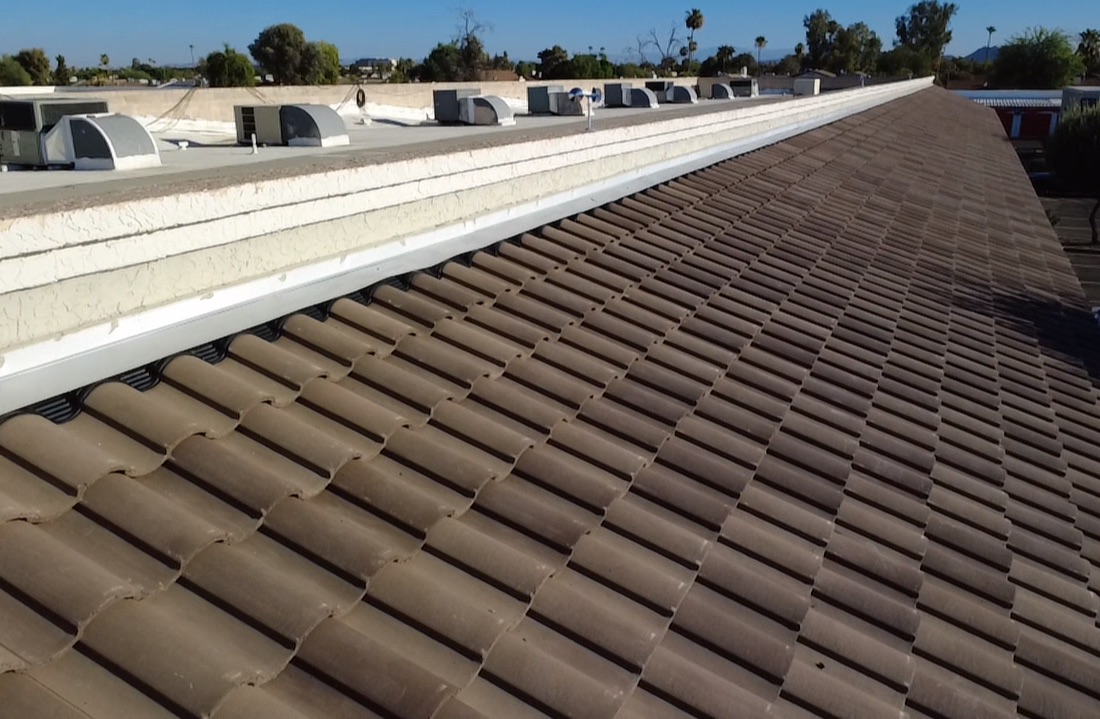
The same run of roof, before and after: a faded 15-year-old tile field beside the flat roof, and the new concrete tile that replaced it.
FAQ
Why replace a tile roof when the tiles still look fine?
Because the tile is not what keeps water out. The tile sheds rain and shades the roof, while the underlayment underneath is the waterproofing layer, and that layer has a service life. On this roof our inspector found no meaningful tile damage at all, just worn-out underlayment after more than 15 years. Reaching the underlayment means lifting every tile on the roof anyway, so the real question becomes whether to reset the old tile or replace it. The approved scope here replaced the tile along with everything under it.
How disruptive is a tile re-roof for tenants who stay open?
Tear-off is the loud part, and it comes with dumpsters on site and some parking blocked off for placement and roof access. On this center we met with property management and the tenants before the crew arrived, staged material by building rather than in one pile, and sequenced the work around each tenant’s business hours. Every suite stayed open for the whole project.
What actually goes under new concrete tile?
On this roof: two layers of Malarkey Right Start UDL over the inspected plywood deck, new wood battens at the manufacturer’s spacing, new 3 x 3 edge metal with a new eave riser and bird stop on every edge, new C channel metal and #1 counter flashings at the penetrations and wall transitions, and so-lite weather block at the hips and ridges with all joints and caps mortared. Up to two sheets of rotted plywood decking were included in the price, with additional sheets at $90 each.
What did this project cost, and what drove the price?
The approved total was $61,950 for 5,950 square feet, which works out to roughly $10.40 per square foot. The drivers were the full tear-off and disposal of both the tile and the underlayment, the two-layer underlayment specified underneath, all-new metal and bird stop on every edge, mortared hips and ridges, and four separate roof areas that each had to be staged, loaded, and closed out on a center that never shut down.
What warranty came with the new tile roof?
A 15 Year Warranty: a 15-year workmanship warranty from Five Guys Roofing covering labor and material, plus a 30-year manufacturer warranty on the underlayment, and free yearly inspections. Coverage on this roof runs to June 27, 2041, and the warranty document was issued to the property at closeout. The yearly inspection is the part worth using, because it is how debris, cracked field tile, and mortar wear get caught while they are still small.
Have more questions? Check out our FAQ page.
Managing a Retail Center With an Aging Tile Roof?
If you manage a commercial or multi-tenant property with concrete tile and you are not sure whether you are looking at repairs or a replacement, request a commercial roof inspection. We will lift tile to check the underlayment underneath, measure the roof areas properly, separate roofing work from carpentry, and give you a scope you can take to ownership with real numbers.
Five Guys Roofing · (480) 892-5311 · ROC# 301077 & ROC# 301076 · fiveguysroofing.com
We do not publish addresses, property names, or client-identifying details.
